You are bound to find a ding on surfboard at least once in your surfing career, but instead of spending a ridiculous amount of money for some “expert” to repair it for you, do it yourself with one of these surfboard ding repair kits.
More...
The worst thing you can do is ignore a ding on your surfboard. It can eventually turn into a crack, which ultimately lead to the demise of your precious surfing stick.
We know some of your surfing buddies out there swear by the power of duct tape, which while we don’t deny its power, would never use it to patch up our boards.
Duct tape or other at-home “remedies” are no match for seawater, which can eventually leak into your board and break away the foam until the day it finally gives in.
The beautiful thing is, a solid surfboard repair kit is easy-to-use and should only take you about 15 minutes or less.
Foamie or fiberglass, there are a vast array of surfboard repair kits out there on the market to get rid of that ding ASAP.
5 Best Surfboard Ding Repair Kits
#1 Super Kit - Solarez UV Cure Polyester Pro Travel Kit

If you have a polyester surfboard, this is easily one of the best surfboard repair kits on the market. The entire kit is very inexpensive, comes with everything you need to make a repair, and also is very easy to travel with or take with you on trips, as it meets the threshold requirements for liquid travel size. Within the kit you’ll find 3 main bottles, a 4 Oz Dual-Cure laminating resin, a 2 Oz Solarez polyester ding repair, and a 2 Oz Solarez Microlite ding repair. Whatever you do, make sure you ONLY use this on polyester boards, as any contact with foam and it will literally melt away.
In the kit you will also find 3 tiers of 5x5 sandpaper, very high-quality stainless steel scissors, masking tape, a mixing cup, a razor blade for smoothing, cleaning pads, catalyst formula, acetone, and S-glass. So yea, you won’t be missing anything when you get started. The entire kit comes wrapped up in a sturdy box that won’t crush during travel.
Many people love the quick, dry-cure resin that Solarez makes, as most UV cure resins tend to retain an adhesive quality, even when fully “dry”. The last thing you should know is that this resin comes through in a clear white color, meaning you might want to add some Mylar film if you’re looking for some color. If you want an all-in-one polyester repair kit with simple, easy-to-follow directions, we can’t recommend a better one.
Pro's
Con's
#2 - Ding All Super Repair Kit OS

If you only have a little bit of money to spend, but still need to get a solid all-in-one kit, we would highly recommend the Super Repair Kit OS from Ding All that is for polyester boards. This kit comes with a 4 Oz Resin Plus Hardener that is perfectly suited for travel.
Other than that, you get a soft fiberglass cloth, 2 tiers of sanding pads, cups with mixing sticks, 2 cover sheets, Ding All’s special Q-Cell filler, and a bonus Sun Cure mini that works best with UV rays. The dings that you’ll be able to repair with this kit will be up to about 5 square inches.
Though the kit works great and the resin really holds up out in the water, there are a few things we would recommend picking up alongside it to get a professional repair. Those items would include masking tape to protect the rest of your board, finer grit sandpaper, gloves for hand protection, a mask for your face, and acetone for a good cleanup. The directions are very easy to follow, so you’ll be able to repair your board in no time!
Pro's
Con's
#3 - Solarez UV Cure Epoxy Ding Resin

The Solarez UV Cure Epoxy Ding Resin comes in a travel-friendly 2 Oz bottle with a tight screw cap. The beautiful thing about epoxy resin is that you can use it for both polyester and epoxy boards.
While this isn’t an all-in-one kit, it is perfect for those who already have the other necessary products at home and just need some good UV cure epoxy formula. The other great thing about this UV cure is that it doesn’t require you to mix anything up.
All you have to do is lay it smoothly across the area where the ding is present, and let it dry in the sun or overnight if you have the time to wait. This is one seriously tough ding resin that has exceptional resiliency when put to test in the water.
It’s also a totally eco-friendly resin, meaning you don’t need a breathing mask while using it, and it is also totally non-flammable, making it safe to use in any environment. It also comes with a few tiers of fine-grit sandpaper so that you can smooth everything out when you’re done. We would highly recommend getting a UV light if you are somewhere that is often cloudy, as this resin is truly meant for the sun.
Pro's
Con's
#4 - Ding All Sun Cure

Another awesome one-off surfboard repair product from Ding All, the Sun Cure resin is very inexpensive UV drying polyester repair kit. It repairs in a matter of minutes when it is exposed to UV rays, whether natural or artificial, no matter the temperature. The lamination that the Ding All Sun Cure lays down is incredibly strong and will get your surfboard back out in the water as if it was brand new.
Ding All has worked to reduce VOC’s (fumes) that come off the resin when using it, reducing the need for a mask when repairing, which is very cool on their part. Because it dries so quickly, you also aren’t left with an ooey gooey mess on your board when you’re done, meaning you aren’t wasting any resin from the small bottle.
Unfortunately this bottle is not travel size like the others, as it is 4.4 Oz. We guess the trade off is having a bit more resin to work with for future dings? Oh well. If you want a solid UV resin for your polyester board that works without any extra applications, the Ding All Sun Cure is an excellent choice!
Pro's
Con's
#5 - Solarez UV Cure Polyester Ding Resin

Besides their Expoxy resin, the guys over at Solarez make a cheaper polyester resin that is perfect for polyester boards only. This fiber-reinforced resin dries onto your board nice and clear without adding a yellowish color like some other low-quality repair resins. Like the Ding All Sun Cure, you do not have to mix this resin with anything before using it, as the resin applies and dries into the perfect fix straight from the tube.
It also dries in a few minutes at most when exposed to sunlight or artificial UV rays like the Sun Cure formula, and you really MUST have sunlight for it to work. Solarez was careful not to have any residual peroxides meaning Solarez is very safe to work with. Lastly, Solarez comes in a travel-friendly 2 Oz tube that is great for the nomadic surfer, and also has two grit sand pads to work with.
Pro's
Con's
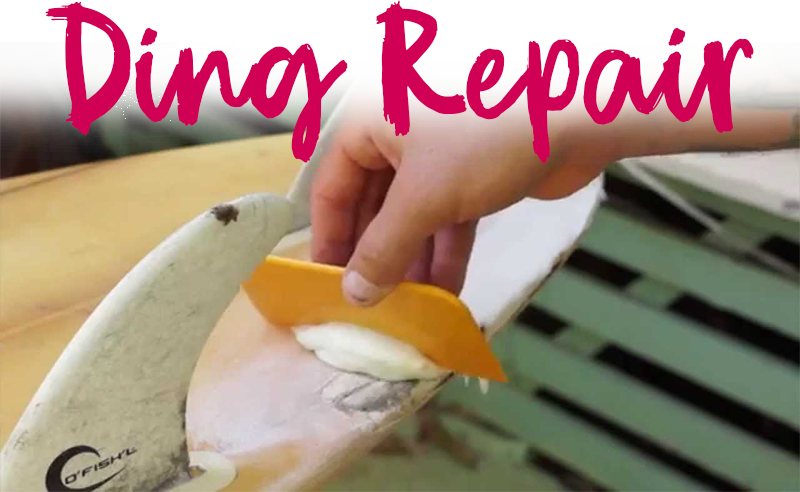
How To Repair A Surfboard
Learning how to fix a surfboard ding is a very vital part of becoming an independent surfer. Not only will you not have to pay a ton of money to fix something that costs you so little time and money, but you also will have the ability to fix your board when a surf shop isn’t available.
Maybe you can even start your own little side hustle repairing your friends’ boards when you become the keeper of the ding repair knowledge. Anyhow, let’s take you through the steps so that you can make sure you execute a thorough and professional repair.
#1 Collect the Necessary Tools
There is a popular French culinary phrase known as “Mise en Place”. It means “putting in place”, and is meant to teach a chef the importance of having everything in its right place before they begin cooking so that they can cook the most efficiently without stopping. The same though process goes for repairing your surfboard. It is important to have everything in place before you begin. While every kit is different, here are the basic tools and supplies you’ll need to get going:
Fiberglass: Reinforces and strengthens the resin so it can hold up in harsher conditions
Sandpaper: Like with wood, sandpaper helps to smooth out the surface of your board before you begin applying your resin and once the resin is fully applied. Make sure to get an array of grits from 60-240
Masking Tape: Protects the areas that aren’t part of your repair from picking up resin.
Q-Cell: Q-Cell formula can help to fill in any cuts or cracks in the problem area
Cup: While not all repair kits require it, some require you to mix things like the q-cell and the resin. That’s where a cup will come in handy
Acetone: People tend to forget this one a lot. Make sure your board is clean and pristine before beginning any repair!
Mask: While manufacturers are beginning to make their repair products with less harmful vapors, it’s still safe to wear a breathing mask while working with any chemicals.
Razor Blade: Remove all the loose debris or residue that are left on after the repair while smoothing it out.
Paint Brush or Popsicle Stick: While both of these are the top options, we really mean anything that can be used to apply resin to the board. This isn’t finger painting after all.
#2 Clean Up the Damages
If there is any loose debris, you’ll want to first remove it. You can do this by using a cloth with acetone if they can be easily picked up, or a razor blade if you really need to get in there surgically. You’ll typically find that if a dent has been left for too long, the foam will start to rot. All of this damaged material needs to be removed so that you are left with a smooth working surface.
#3 Sand It
Actually, even before you begin sanding, remove any top layers of wax that still may be on your board. Then sand the damaged area down to that you have a rough area that is SLIGHTLY sunken into your board, only enough so that when you apply resin, it bonds like a flat surface with the rest of your board. To do this, you’ll want to use low grit sandpaper (60 works).
#4 Apply Masking Tape
Make sure to apply masking tape. You don’t want resin to dry onto any part of your board that it shouldn’t be on, as it will make the surface uneven.
#5 Apply Q-Cell
If you have gaps from any foam that you had to cut away, that is where Q-Cell will come in handy. It essentially works as an alternative to foam that binds with the foam that is already in your board. Mix it with a very small amount of sanding resin and mix it until it turns into a paste like substance. When you notice it has a paste-like texture, add some catalyst, and being applying to the ding. Carefully pour it into the ding and use your brush or popsicle stick to make sure every nook and cranny is filled so that you are left without any hollow space. Don’t worry if you pour too much in to where it sticks out, as you can always sand it down.
#6 Sand again
If you used Q-Cell, you’ll need to sand it down so that it matches the rest of your board. If you can, sand it just a bit below the surface so that you can apply the top layer of resin.
#7 Apply Fiberglass and Resin
Cut your fiberglass a bit bigger than the damaged area on your board and set it to the side. Mix up your sanding resin with your catalyst until the mixture hardens a little bit, then use your brush or popsicle stick to apply smoothly atop the damaged area. Once that is done, lay your sheet of fiberglass on top. Some repairs require multiple sheets of fiberglass, so if you notice your repair needs some extra fiberglass to really strengthen it up, repeat the same process atop the first layer.
#8 WET SAND!
Give your resin and fiberglass some time to dry and harden before sanding it with polish. When you sand, make sure that the damaged area matches the rest of your board and that it is flat without any weird bumps or rough edges. Also make sure to sand very cautiously, as a heavy hand will just break up the fiberglass and cause you to start the process over. The polish will give it a nice and shiny look to match the rest of your board.
Frequently Asked Questions
How much time do I need to let my board cure before I go back out in the water?
Though some manufacturers say that their curing formulas are instant, we would highly recommend giving any curing formula at least a day to fully cure before taking your board back out there. The longer, the better. After all, a repair isn’t worth anything if it doesn’t last you more than a surf session. ALWAYS make sure to give your board a good inspection before taking it out in the water.
Why would I get a travel kit vs. a simple bottle of resin?
The travel kits are awesome if you are very experienced in repairs / have some serious repairs to take care of. Otherwise, we would highly recommend getting the resin. Any damage that is VERY serious, we would not recommend trying to fix it yourself, as you could completely ruin your board. The resin is great and is more valuable to general community of surfers, as it is more travel-friendly, is great for quick-fix situations, and doesn’t include a bunch of items that may be unnecessary to you.
Can I use a UV light to repair a board with UV cure resin?
Absolutely! Not all of us are blessed to live in sunny southern California. Some of us might even like the cloudiness of the bay area and beyond. This is where UV bulbs come in handy. They are very inexpensive and can easily be attached to a cheap fixture with a ballast so that you can suspend it over your work space.
Should I get a polyester or epoxy kit?
The first thing is that you should know your board before buying any kind of resin, as you’ll want the correct resin for the type of board material. Once you know that, if you have the ability to get epoxy resin, know that it is very beneficial. It is much stronger than polyester resin overall, it is more resistant to moisture, it doesn’t smell as bad as polyester, and it lasts longer than epoxy. On the other hand, it is much more expensive than polyester. When it comes down to cure time, it totally depends on the specific product and the manufacturer.
Is Solarez better than Ding All?
To be honest, they’re both essentially the same products in different packages. Just read our reviews and / or the bottles before actually purchasing them to make sure they are right for you. It comes down to preference when you look at the big picture.
Is this only for advanced surfers?
A beginner or advanced rider can use a repair kit, it really comes down to the requirement of having a hard surfboard (some beginners start with a soft top but you can learn on a hard board). So where you are taking surfing lessons in New York or a seasoned vet, any level of surfer will sooner or later need a repair kit.
Final Thoughts
There is a freeing feeling when it comes down to repairing your own surfboard. Knowing that you are independent and can fix it without relying on anyone else is far better than waiting around for a shop to fix it while good surf days pass you by.
Whatever product you ultimately decide to purchase, make sure you read about it very carefully and ALWAYS follow manufacturer instructions, even if you think you know what you are doing. Have fun and keep your dings in check!