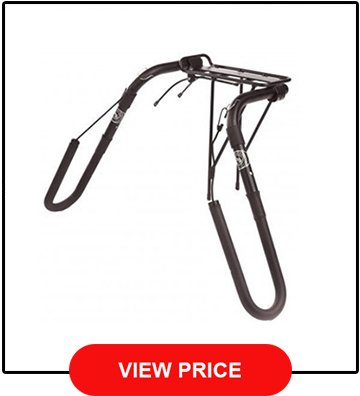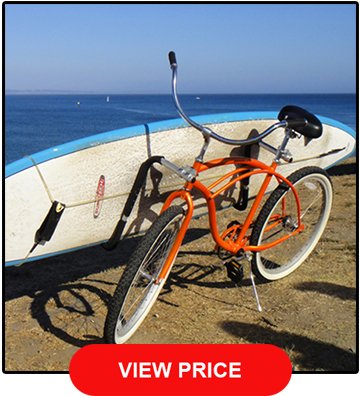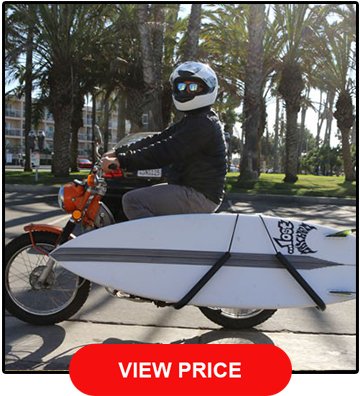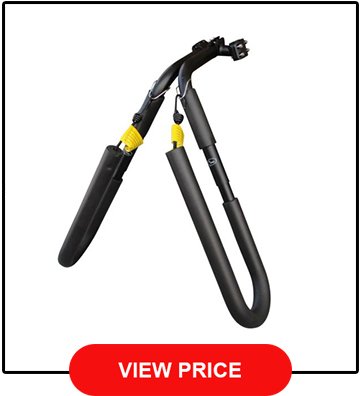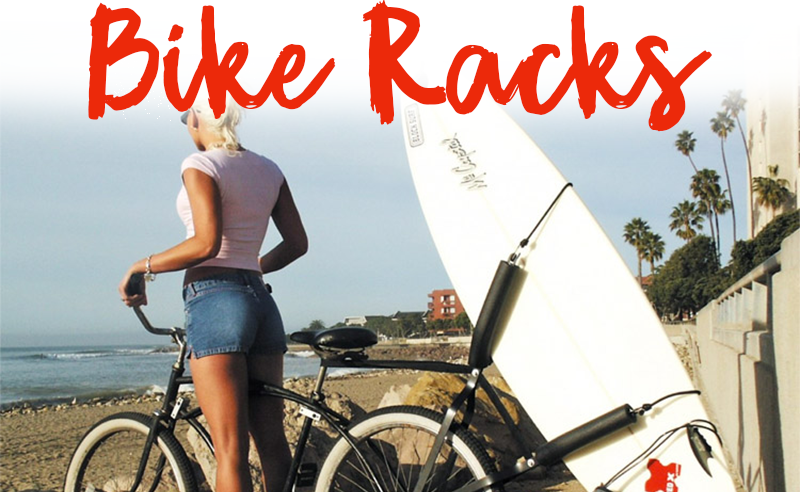
If you live close enough to the beach and just like to bike down with your board, you should definitely check out our list of the best bike surfboard racks.
More...
If you’re close enough to your favorite surf spot, there is no reason to be driving down there. Having a bike surfboard rack is a secure and eco-friendly way to transport your board.
Not only are you helping to go green, but riding down to the beach with your board can be a nice little warm up prior to getting in the surf.
There are three basic types of bike surfboard racks that either attaches to the side, the rear, or the upright rear.
There are definitely pros and cons of each of these types of racks that you need to keep in mind before making the purchase. There are also other types of surfboard racks for cars, wall and storage uses as well.
Luckily, we’re here to make sure you have a smooth ride down to the water and a beautiful day out in deep blue.
The 5 Best Bike And Moped/Scooter Surfboard Racks
Our #1 Pick - Carver surfboard rack
Carver Racks is a cool little company based out of Oahu that was founded in 2003 and has been making great racks ever since.
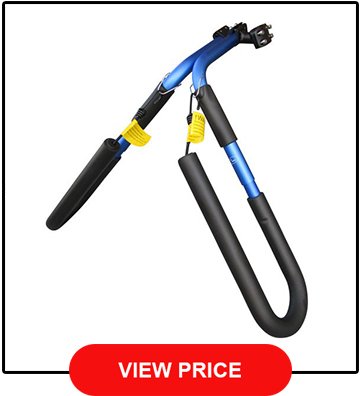
Their longboard Carver rack is an integrated rack that mounts to the rear of most all standard bicycles. It is made with an extremely strong aluminum construction that will not only withstand the test of time, but also keep rust away.
The aluminum tubes also come with padding to protect the rails, top, and bottom of your board. While Carver has an array of racks for different sized boards and configurations, this specific rack will fit boards that are up to 4” thick and 10ft long, hence the longboard name.
You can also configure this model with thicker arms if you want to transport your SUP. It is very comfortable to ride with as well. With a sleek and simple design, this rack is perfect for cruisers and non-suspension bikes.
#2 - Moved By Bikes (MBB) - Surfboard Rack
Moved By Bikes is an awesome California company that has been serving up some legit bike racks for about 7 years now. Surfers have said that they have used this rack to carry boards up to 11’ long. It is made of an anodized aluminum with stainless steel hardware and comes in a silver-black.
The aluminum is great because it won’t rust. It is designed to mount straight on your frame along your bike frame head tube and to the back of the seat post.
You can also configure it to mount to your cargo rack as well if you have one. We love the quick release arms that allow you to take it off your bike without a fuss or fight! In all, it is extremely versatile and probably the most versatile rack on the list.
It weighs less than 5lbs, so it won’t feel like a burden to ride around with it. MBB has a couple different frames in their lineup, though we feel the original side frame is their best yet.
#3 - Ho Stevie! Scooter/Moped Surfboard Rack
Created by the guys over the legend himself, Steve Mara, this surfboard rack was meant to make your life easier if you are riding a moped or scooter.
The rack works for most scooters and moped and comes with a mount that can be easily placed on the rear cargo rack. Many note that they have gone over 40mph with their boards still feeling perfectly secure.
Just like most of the competitors on the list, Ho Stevie makes their rack with a strong and ultra-lightweight aluminum construction. It is an anodized aluminum, meaning it won’t chip or rust. The rack is rated for surfboards up to 8ft, though reviews suggest people have found it pretty comfortable with longer boards.
We love how the arms adjust to better cater to the type of board you are carrying. Bungee cords are a nice addition to the padding to and, not only keeps your board safe and secure, but to makes sure that nothing is digging into the rails.
#4 - Carver Surfboard Bike Rack - Shortboard
The guys at Carver Surfboard Racks also have a solid little rack for shortboards. They decided to make this rack that mounts to most seat posts. The Carver Shortboard rack supports boards up to 8’ in length.
It works well with just about any bike you can think of, and even suspension bikes, which is awesome for a bike surf rack! The rack is made out of an environmentally friendly and lightweight welded alloy that won’t rust or scratch up your bike frame when it’s on.
It utilizes bungee cords to make sure that your surfboard stays on safely and securely. The handles are wrapped in soft foam to protect your surfboard even further from dents and dings. This specific rack is available in black only, though it really has a nice look that should fit any style of bike.
#5 - Ho Stevie! Surfboard Bike Rack
Another solid bike rack created by the guys over at Ho Stevie, it’s a solid choice that is made to make transportation simple, easy, and affordable.
The rack is made to mount to your seat post. It has been tested on bikes from beach cruisers to BMX bikes, and works on all of them, though they do recommend using it with a lightweight seat post.
The rack itself is made of a lightweight rust-free aluminum material with foam covered arms that can easily be removed when not in use and adjusted to fit your board properly.
That being said, the arms can support boards up to 8’ in length and come with bungee cords to wrap around the board securely. It is probably one of the simplest racks on our list and that is the reason why we love it so much.
How To install A Bike Surfboard Rack
Every rack is a little bit different so there really is no golden set of directions that fits all of them. Even with that in mind, most of them are fairly similar and super easy to set up and take off. We’ll give you an example of how to put on our favorite Carver Rack!
- Put your rack together after taking it out of the package (directions should be included)
- Undo the seat post clamp bolts from your rack and clamp it under the seat of your bike around the post. Tighten the bolts using an allen wrench or whatever tool that is necessary
- Put your board on to the arms and tie it up with bungee cords.
- Ride out!
Frequently Asked Questions
What are the advantages and disadvantages of the side rack?
The side rack is the rack that we definitely see most often. That’s for good reason. A board fits more safely and securely on the side of your bike more than anywhere else. Because your board is pointing towards the wind, there is less resistance. This means it is easier to pedal and more difficult for the wind to blow your board off. If we had to find one disadvantage of the side rack, it is that it increases the width of your bike. You’ll have to be more careful and conscious of your added width so that you don’t run into anything or anyone.
What are the advantages and disadvantages of the rear rack?
Rear racks tend to be a little cheaper and less popular than side racks, though they do work well. The nice thing about it is that the board sits at an angle behind your back, which means it doesn’t increase the width of your bike. This is awesome if you have to ride through crowded streets or boardwalks to get to your spot. The one issue is that the board is now a beacon for wind. Because it’s sticking up, it can get caught and make you lose control of your bike, especially if the wind is strong that day. Some surfers also have had problems with it messing up the back tire because they have to over tighten the rack to keep their board secure. Not only that, but it can screw up your board. Essentially finding a balance between crushing your rails and letting your board drag against the concrete can be a bit difficult with a rear rack.
Is it possible to make my own surfboard rack?
Absolutely! Whether you want to save some cash or you just have the DIY mentality, all you need is a few PVC pipes, some tools, and ingenuity. Here’s a list of the materials you’ll need.
- 1 long 1” PVC Pipe
- 6 1” PVC Pipe Elbows
- 2 1” PVC Pipe Tees
- 4 Hose Clamps
- PVC Glue
- Pipe Insulation
- 2 Bungee Cords
- Saw to Cut the PVC Pipes
- Screwdriver or Allen Wrench
- Drill
- Step 1 is to create the arms that will hold your surfboard. If you look at other board racks, they all have a “U” shape that carries the board. You’ll want the same thing. Begin by making sure that the Tee will fit around your seat post. That is, your seat post should be less than the diameter of the inside of PVC tee.
- Use your saw to cut the long part of the tee so that it snaps around the post of your bike. This cut shouldn’t be any wider than 1/3”. Start small before cutting too much, as cutting too much will make it fall off. If the inside of the tee is too big for your seat post, fill it with a little bit of pipe insulation. Once filled, clamp them tightly onto the post with the hose clamps.
- Step 3 is cutting your pieces. Measure from the seat post to the outside of your bike pedal and cut two arms there two inches longer than that measurement. Attach them to the tees with an elbow at the end facing down. Now the inside vertical pieces for the arms. One piece should be equal to ½ your board width + 3 inches. Obviously make sure it isn’t touching the ground. The other vertical inside arm should be longer as it will be coming out of the higher tee. Measure accordingly. Add elbows to the bottoms of those pieces.
- Step 4 is cutting the bottom part of the rack. The cuts for these pieces should be your board + 1.5”. Attach them to the elbows and insert elbows facing up to the ends of those. The final pieces will be the outside arms. These two arms should be about 2” longer than the inside vertical pieces. Sick those into the elbow.
- Step 5 is gluing all the pieces together. Make sure that everything is perfect before you do this, as you can’t come back from it once done. Put glue around the inside of the tees and elbows and stick the straight pieces in, forming the shape of the bike rack.
- Step 6 is drilling small holes in the tops of the outside vertical arms to put bungee cords in. Drill one hole at the top of each arm and tie your bungee cord to the inside

