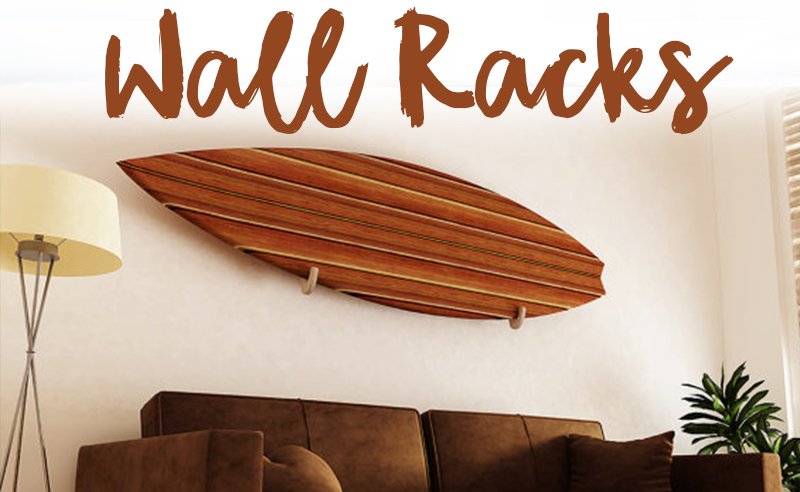
Surfboard wall racks are, by no match, the best way to store your surfboards. It can be hard to find a solid place to store all your boards, especially if you don’t have a ton of space in your house or apartment.
More...
Every surfer wants to be able to just take their board and go, so storing them in an attic or garage can be annoying. Most surfers we know have such an affinity for their boards that they think of them as pieces of art. So where do you look if you want to display your beautiful quiver while keeping them out of the way?
That’s where the surfboard wall racks come in handy. Different wall racks can depend on surface area, mobility, build, or aesthetic.
This is why we have compiled a list of some of our favorite surf racks so you can get organizing right away!
The 5 Best Wall Mount Surfboard Racks
Our #1 Pick - Bamboo Surfboard Quiver Rack, 5 Surfboards
This is a solid surfboard rack made out of a beautiful bamboo grain with a warm, golden color that is plenty strong enough to hold all your boards.
It sports a nice, thin and modern look and slits that are just the right size and angle to keep your boards nice and secure. Holding 5 boards, it is large enough for you and your family or roommates to use. Installation is easy too. All you have to do is drill in the top portion and let the arms hang down off of it.
All together, it supports about 130lbs. If you decide to get a different model in the same series, you can easily swap out the cradles to craft your own customizable wall rack. This is awesome if you don’t need all 5 cradles.
The rack allows you to display all of your boards in a slick and space-efficient way with padding that protects from dings and dents. As far as these surfboard wall racks go, we love the natural look.
#2 - Bamboo Vertical Wall-Mounted Rack, 4 boards
This surfboard / SUP rack is a little bit close to something you would see at your local shop, yet still has that solid bamboo design. Holding 4 boards, with incredibly versatile arms and bases that can store boards of various shapes and sizes, we love the how the vertical design rids the need of worrying about weight capacity or possible wall damage if your walls are weak.
Like its cousin, the aesthetic is a beautifully natural bamboo grain that has a rich hue of gold. With that immensely strong ¾” bamboo, you know that this thing is going to last you through the years without wearing.
Grassracks has added their trusty padding on each arm that helps protect your board from dings and dents, so you can have peace of mind when you quickly take or place your board on the rack.
#3 - Pro Board Racks - "The Lineup" Surfboard Rack

This is another wall rack that acts like more of a surf shop or trade show rack with its vertical design. Don’t be fooled by the thinner wood design, as this rack is extremely durable. It is made of a strong, 100% Baltic Birch wood and doesn’t require any sort of tools or hardware to set up.
All you have to do is unfold it, fit the wood pieces together, and you’re ready to go! There is a nice, thick padding on the bottom and side rails to give your board a nice little cushion to rest up against so that it stays protected.
The boomerang-style shape gives this rack an ultra-modern, yet natural look. Unlike the other racks, if you’re working with thicker surfboards or SUPS, they might not fit in-between the arms, as they are not adjustable like the first two.
#4 - Stoneman Sports - Freestanding Storage Rack, 5 Boards
Here’s where things start to change up a little bit. This impressive 5-board wall rack is constructed with a heavy-duty steel frame with rubber-like wraps around the arms to keep your boards protected.
Each pair of arms can hold up to 40lbs, while all together, the rack can sport up to 200lbs. The coolest thing about this rack is that the arms can be adjusted to point up straight or at an angle. Angling the arms can be great if you’re working with less room.
The rack itself sits on the floor instead of on the wall, so you don’t have to worry about trying to mount or install anything permanent into your home or shop.
When you need to store the rack or just make space for something else, you can easily remove the arms by pressing in the push- pin and pulling them out.
#5 - Bamboo Rack, 2 boards
This 2-board wall rack is our simplest wall rack on the list and can support up to 120lbs in total with the thickest of boards. We love how this one supports the boards while they’re slanted up, as it takes up much less space than if they were pointed out vertically.
The hook on the bottom is made to store your paddle so that you can keep everything together in one place, which will help speed up the process of gathering up your equipment to get out there.
The installation for this mount is incredibly easy and should only take you about a minute. This is because of the unique Grassracks mounting system that we see on their whole series. With a nice bamboo design, it should keep the walls of your home scuff-free, all the while protecting your boards with special cradle padding.
Surfboard Wall Rack DIY
If you’re the kind of person who loves to build their own stuff, or you just want to save the money, as these racks can be a bit expensive, we’ve got just the right DIY surf rack for you! We love horizontal wall racks more than anything, as they tend to be easier on the boards, as well as reduce the risk of damage to your board’s tail. This wall rack should realistically only take you a day to build, so if you have a bit of free time, follow these instructions to get it done!
Gather Your Materials
- 1 Drill w/ a ¼ drill bit
- 1-1.5” Hole Saw Bit or bigger
- Tape Measure
- Square
- Mallet
- Saw (Only for cutting PVC so it does not have to be electric
- 2 2x4s
- ¾” PVC Pipe (Buy them long so you have extra in case anything goes wrong)
- Screws
Mark Your 2x4s
Depending on the thickness of your surfboards or SUPs, space your holes out about 3-5”. If you have a 4” SUP and you only space these apart 3”, they won’t fit, so here’s where it is necessary to know exactly what you will be storing. Begin by moving about 2” from each end of the 2x4 and drilling your first hole there so that you leave some space. Measure it so that each hole is in the vertical center and so that they are lined up straight across. You can do this by using your square.
Start Drilling
Take your hole saw bit and begin drilling into the places you marked on your board. Make sure that you drill all the way to the other side of your board. If you don’t have a thick enough hole saw to do that, you can easily follow the shape of the hole with a longer and slimmer drill bit so that the hole goes all the way to the other side. Your board should now have holes line up long-ways across its entirety.
Mounting
Find the studs in your wall, as this is where you will be mounting these boards. For this, you can either use a stud finder or knock on the walls to find the space that isn’t hollow. Now it is time to mount your 2x4s. Begin by drilling them in with your screws, either parallel to each other or at a symmetrical angle, on the top and the bottom so that they are supported along the entire length. We really dig the A frame look, as it allows you to put shorter boards on top and longer boards or SUPs on the bottom.
Mount the Arms
Grab your saw and measure out your PVC pipe. We think it’s a good idea to cut these at least 40” so that it will support just about any thickness of board. The PVC pipe will also be about 1.5” inside the 2x4 when inserted, so make a note of that before cutting them. Now it is time to inset the arms into the holes. You want them to be tight enough so that they won’t slip out, but not too tight that you can’t remove them once they are in. This is where you can use your mallet to knock them in there. If you are having hard time getting them in the holes, you can sand them down a bit.
All Done!
So there you have it. Rack up your boards and make ‘em look good. This was obviously the simplest rack design, though if you want to add padding on the PVC or paint anything, you can obviously do that. If you want to keep your boards even steadier, you can use bungee cord to make sure they stay up on the rack.
How To Hang a Surfboard On a Wall
Some people don’t need a utility-style rack for their surfboards, but would rather just display them for decoration. There are single surf racks that you can find online for this sort of thing, though we’re going to tell you how to do it yourself if you want to.
Tools and Materials
Measuring Tape
Stud Finder
Pencil
Level
Drill and bits
Hammer
Wall Anchors
Surfboard rack arms (either wood or acrylic)
Instructions To Place the Board Horizontally
- With your surfboard laid out flat, measure from one point to the other length-wise. These points will be where the rack arms will touch the board. Typically, you’ll want to measure to just about where the board starts to curve on each side. We’ve noticed this is one of the more aesthetically pleasing styles. Typically, wall studs are either 16 or 24 inches apart, so try and use multiples of those numbers when measuring if possible.
- Find the studs in your wall using a stud find and mark the two spaces where you will mount the arms.
- Use the level to make sure that both points line up straight together.
- Hold the rack arms against those points on the wall and mark around them with a pencil. Remove them from the wall and drill in your pilot holes. Utilize the hardware (anchors, screws, etc) to secure them onto the wall.
- Put your board on the rack.
Instructions To Place the Board Vertically
- Find a stud on the wall with a stud finder and mark the center of it with your pencil. With a level or some sort of straight object, measure up from the floor to wear you the want the end of the board to be resting
- Place your rack arm over that point and pencil in the holes where the screws will go, all the while making sure it is level. When it looks right, secure the arm to the wall.
- Move straight up from that point and mark where the top hole will be. You’ll want this mark to be just under the nose of the board. Make sure that it is in line with the bottom arm.
- Repeat the same process with the top arm as you did with the bottom and secure it into place
- Put your board on the rack!
Frequently Asked Questions
What are some creative ways to display my surfboards?
We love the classic above-the-couch look. Typically surfboards will share the same or similar length as a traditional loveseat, so it looks really nice when mounted parallel to it. If not your sofa, try and find another piece of furniture with a shorter height to mount it over horizontally.
If you want to hang it vertically, we recommend hanging it next to a door or on a smaller, open spot in a space like a hallway
We love the idea of putting other racks beneath or around your mounted surfboard for hats, coats, bags, or other items.
What is stronger, bamboo or steel?
You might be surprised to find out that bamboo is much stronger. In fact, it is probably one of the strongest things you can find out in the world. It has a better resistance to being pulled apart when compared to steel and can withstand compression a whole lot better when compared to concrete.
Are the bamboo racks environmentally friendly?
Although we don’t see it much in the west, if you live in a temperate or tropical climate, you’ll find that bamboo is just as common as a weed. As deforestation continues to bring detriment to the plant, many large environmental organizations are beginning to utilize bamboo instead of traditional wood to build homes, furniture, and a number of other things.
How do find studs in your wall without a stud finder?
It’s actually fairly easy to find studs in your wall if you don’t have a stud finder. All you need is your knuckles. Find the best angle to get a listen to the insides of your walls. You can do this by placing your ear on it. Tap on the wall with your knuckles. If there isn’t a stud, it should sound hollow. If there is, it should sound dense or solid. You can now use this stud as a reference to find the others. As we mentioned, studs are traditionally 16 or 24 inches away from each other.
Will these surf racks hold my boogie boards or skimboards?
This depends on the size. Many boogie boards or skimboards are too short for these racks, horizontal or vertical. Your best bet would be to get the grassracks surf racks, as you can freely adjust the closeness of the cradles / arms.
Final Thoughts
There you have it, you can't go wrong with one of these 5 epic wall racks.
There are also other types of surfboard racks as well to check out like racks for cars, bikes and vertical storage racks too!


